How to Properly Implement Officemate's Lens Loader
The VSP Interface in Officemate has come a long way from when I implemented it three years ago. You can find the latest VSP Interface checklist on page 483 of Officemate Administration v12.0.3 Guide. The newest implementation method provided by Officemate is a module called the VSP Setup Assistant and it walks you through each step to get VSP Interface up and running.

If you look at the checklist, lens setup is 70% of the VSP Setup Assistant, so using Lens Loader properly is essential to proper VSP Interface implementation. The VSP Setup Assistant is a stripped-down, guided version of properly setup your lenses in Officemate. I want to show you how to properly use the actual Lens Loader feature.
How Does Lens Loader Work?
The “Lens Loader” feature provided by Officemate is a tool that imports uniformly-named lenses directly from Eyefinity into your database. When you 1) select a lens to import, it 2) filters through the prices set in your 3rd Party Attributes, and 3) creates lens combinations which usually needs 4) further refinement of other attributes.
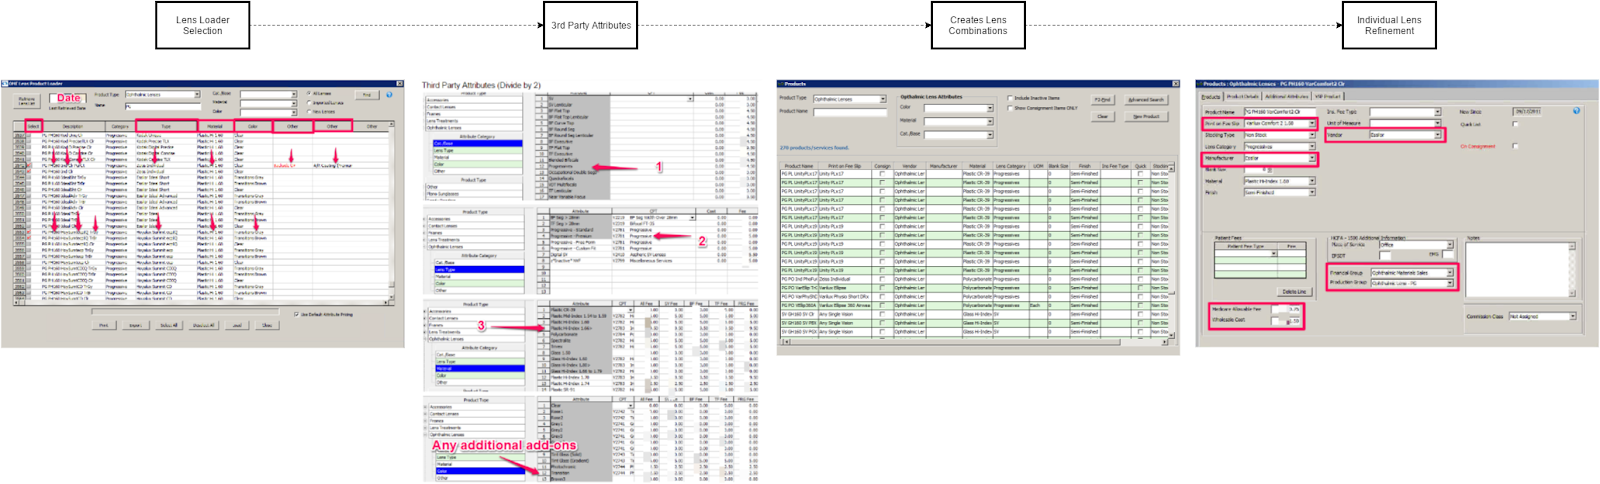
So on a granular level, for every lens combination you select, it will automatically price out each feature in a lens combination.
This process is nearly automated, but ONLY if you have third party attributes set up properly. Using Lens Loader sets up the foundation for enabling VSP Interface and Electronic lab orders, which can save you up to 15 minutes per order by automating the lens ordering process!
Even if you don’t intend on using VSP Interface, the lens loader is a way to uniformly name your lenses and will allow you to easily converse with technical support should a lens product issue arise.
Even if you don’t intend on using VSP Interface, the lens loader is a way to uniformly name your lenses and will allow you to easily converse with technical support should a lens product issue arise.
How To Properly Implement Lens Loader
Prepare
Preparation is key. One missed step and it could cost your practice thousands of dollars if one attribute is mispriced.
- Designate a Project Coordinator and execute this project. Successful implementation relies on communication. You don’t need an EHR implementation team, but someone who understands the dispensing and administrative side.
- Fee Schedule. Have an “Officemate Friendly” fee schedule (similar to this), to reference when pricing out your lens attributes and also for auditing and refining your imported lenses. Know what exact Progressive Lens styles you offer beforehand. This fee schedule will act like a legend does for a map.
- Backup your database. I always make a backup when I make major changes to my settings. I’ve had to do it once and I don’t know what I would have done if I didn’t.
- Third Party Setup. In Officemate Administration, click on Setup, and then go to Third Party Setup. Click on the Attributes tab. You must price most of the Ophthalmic lens attributes at half price and most of the Len Treatments at full price.
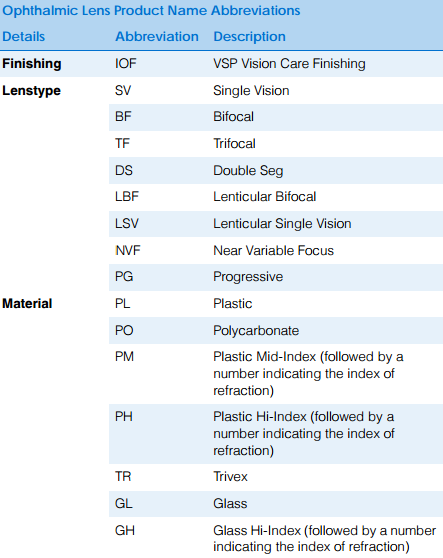
- Staff training. Communicate to your employees that your lenses in your Rx Orders are changing. To search for lenses they will need to learn to filter by lens type abbreviations. For example, to find a certain progressive in polycarbonate, they will have to learn to type “PG PO.” It may also help to print a cheat sheet or the fee schedule to use for the first two weeks. A good rule to implement: if it’s not in Officemate, you cannot order it until it is.

Execute
Clean out your lens products and start fresh with Lens Loader.
- Deactivate Current Lenses. Eyefinity recommends deactivating all of your existing lens products (if they are not from lens loader) to prevent opticians from accidentally using them, which could cause issues with future integrations (VSP Interface).
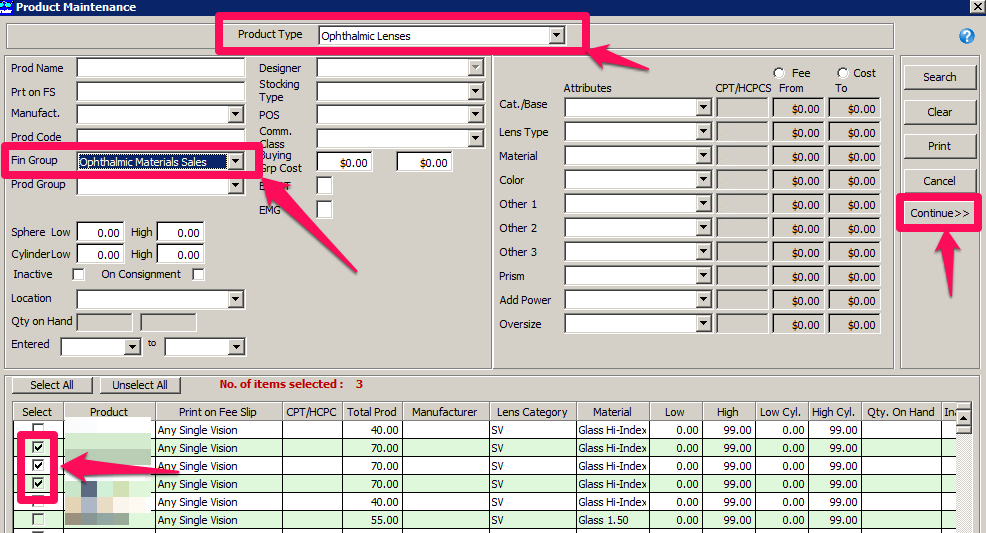
- In Officemate Administration, click on Tasks and then Product Maintenance
- Select Ophthalmic Lenses, the Financial Group - Ophthalmic Materials Sales, and select all your OLD lenses. Click Continue>>
- Click on Inactive and True to erase your selected, OLD lenses
- Lens Product Loader. Import your lenses.
- In Officemate Administration, click on Tasks and then Lens Product Loader
- Click on Retrieve Lens List to update your catalog with the latest lens combinations. Be patient, this can take 10 minutes or more.
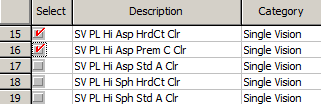
- Select ONLY the lenses you wish to import. I recommend doing this part in increments by Lenstype, i.e., PG. You can even filter by material, i.e., TR.
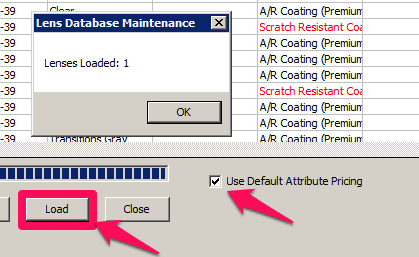
- Ensure that Use Default Attribute Pricing is checked and click on Load to load all selected lenses.
- Do this for all lens types, styles, and materials that you use. Try to keep your selections to a minimum. You don’t need to import all the Transitions and Polarization colors in every progressive lens style and material if you don’t use it. The more combinations you load, the longer it will take for your opticians to select, the more margin for human error, and the more upkeep you’ll have to do. Keep your lens catalog as simple as possible!
- If you run into any issues, please refer to the instructions on page 239 of the Officemate Administration v12.0.3 Guide.


Audit
Audit your “Lens Loaded” lenses. After your lenses have been loaded, I usually ensure that all lenses have the correct information in all the tabs.
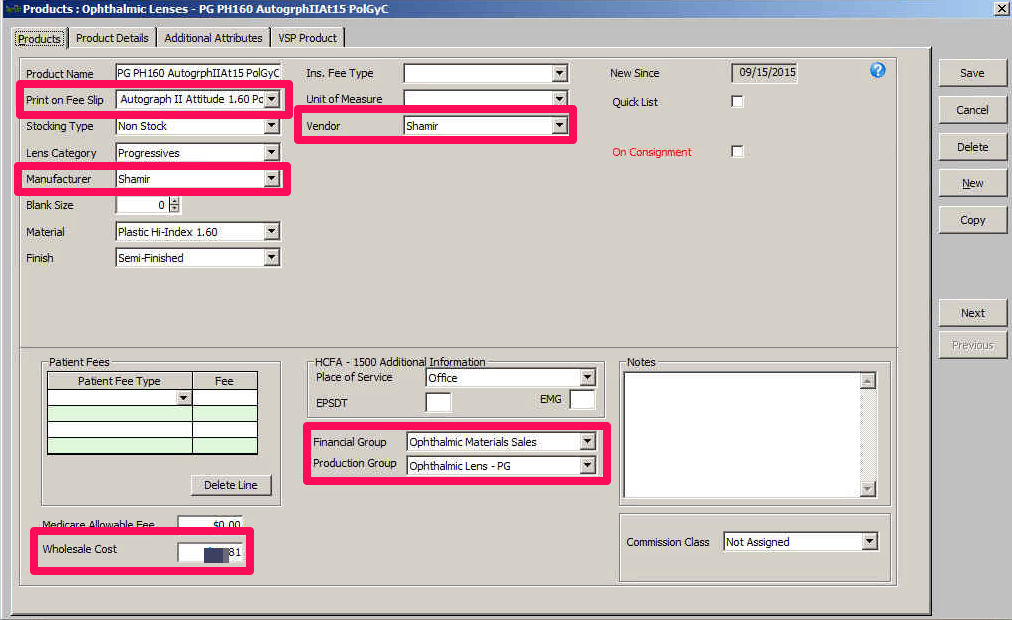
- Product Tab
- Print on Fee Slip. The Print on Fee Slip section useful for both 1) easily guiding opticians to specific lenses and 2) creating accurate patient itemized receipts.
- Vendor
- Manufacturer
- Financial & Production Group
- Wholesale Cost
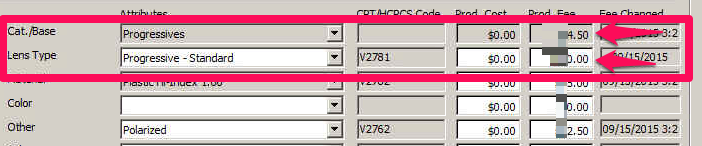
- Product Details
- Double-check pricing. Your total Prod. Fee should total ½ of the lens usual & customary. Most SV and BF lenses should be priced correctly. If a lens doesn’t match your fee schedule, you may want to revisit your third party settings and/or manually edit it in this section.
- Note: Lens Attributes Limitation. I found it strange that Lens Loader has five categories of VSP progressives (K,J,F,O,and N), but Officemate only has two recognized progressive attributes: Standard & Premium. That means you will, more than likely, have to edit all the prices for EVERY progressive lens combination.
- Also, keep in mind that Cat/Base for all progressives is your bifocal usual & customary, divided by two. Don’t worry, the CPT code will be automatically generated based on each patient’s Rx.
- VSP Product
- If you are planning on using VSP Interface, ensure that the proper Lens is selected for each product. This should be correct if imported from Lens Loader.

Auditing Tips:
- You could use Product Maintenance to edit lens options in batches, but it will not allow you to efficiently edit all the fields discussed above and also, I like to ensure that all fields and prices are correct.
- By filling out all the relevant fields above, it will help create powerful reports, easily navigate through your lenses, print comprehensive lens listings, and more!
- You can click on the Next button to quickly save and continue to the next lens product.
- Don’t forget any additional attributes!
- If you use non-VSP approved lenses, DO NOT DEACTIVATE those lenses they will not be in the catalog. If you did, no worries, you can reactivate them later.
Refine
Even with every detail scrutinized, something can (and will) be missed. Keep the line of communication open between the project coordinator and the dispensary.
- Test. Take a snowball sample of different lens types, materials, and styles and create a fee slip. Determine if it is correctly priced. (This is only a crucial step if you are using VSP Interface. If that is the case, then I suggest you test all your lenses with a real VSP Authorization.)
- Monitor your actual patient Rx Orders and Fee Slips. There may be misconfigured lenses that will not price correctly. It should be each optician’s responsibility to audit the prices automatically generated by Officemate, at least for the first few weeks.
- Communicate any issues that may arise, such as a mispriced or missing lens with the project coordinator.
If you’d like to practice any of the steps above, check out the Officemate demo and play around on there first.
I’m not going to lie, if you made it through this long and tedious guide, you can expect the same when you first use lens loader. I promise that after your initial setup, adding and changing lenses will be much easier. If you know of a better way to do this or have any comments, please comment below!
I’m not going to lie, if you made it through this long and tedious guide, you can expect the same when you first use lens loader. I promise that after your initial setup, adding and changing lenses will be much easier. If you know of a better way to do this or have any comments, please comment below!


Comments
Post a Comment